Basement Inspection Checklist: What to Look for Before Bigger Problems Start
A basement is often one of the most revealing parts of a house because many structural, plumbing, drainage, and utility components are easier to see there. If you want to catch moisture issues, foundation warning signs, deferred maintenance, and repair concerns early, this is one of the best places to start.
This basement inspection checklist is designed for homeowners, sellers, and anyone doing a simple visual walkthrough. It does not replace a licensed home inspection, engineering opinion, or contractor assessment, but it can help you notice red flags that may affect repair cost, safety, property value, or your timeline for selling.
Start With a General Basement Walkthrough
Before focusing on one problem area, pause and get a feel for the space as a whole. Notice whether the basement smells musty, feels humid, looks recently painted in isolated spots, or shows signs of patching, cleanup, or cosmetic covering. Pay close attention to corners, lower wall sections, utility connections, and areas hidden behind storage or shelving.
Many basement problems are easier to understand as patterns instead of isolated signs. A single damp corner may not look serious by itself, but when it appears alongside staining, rust, bubbling paint, or a constantly running dehumidifier, the full picture becomes more important.
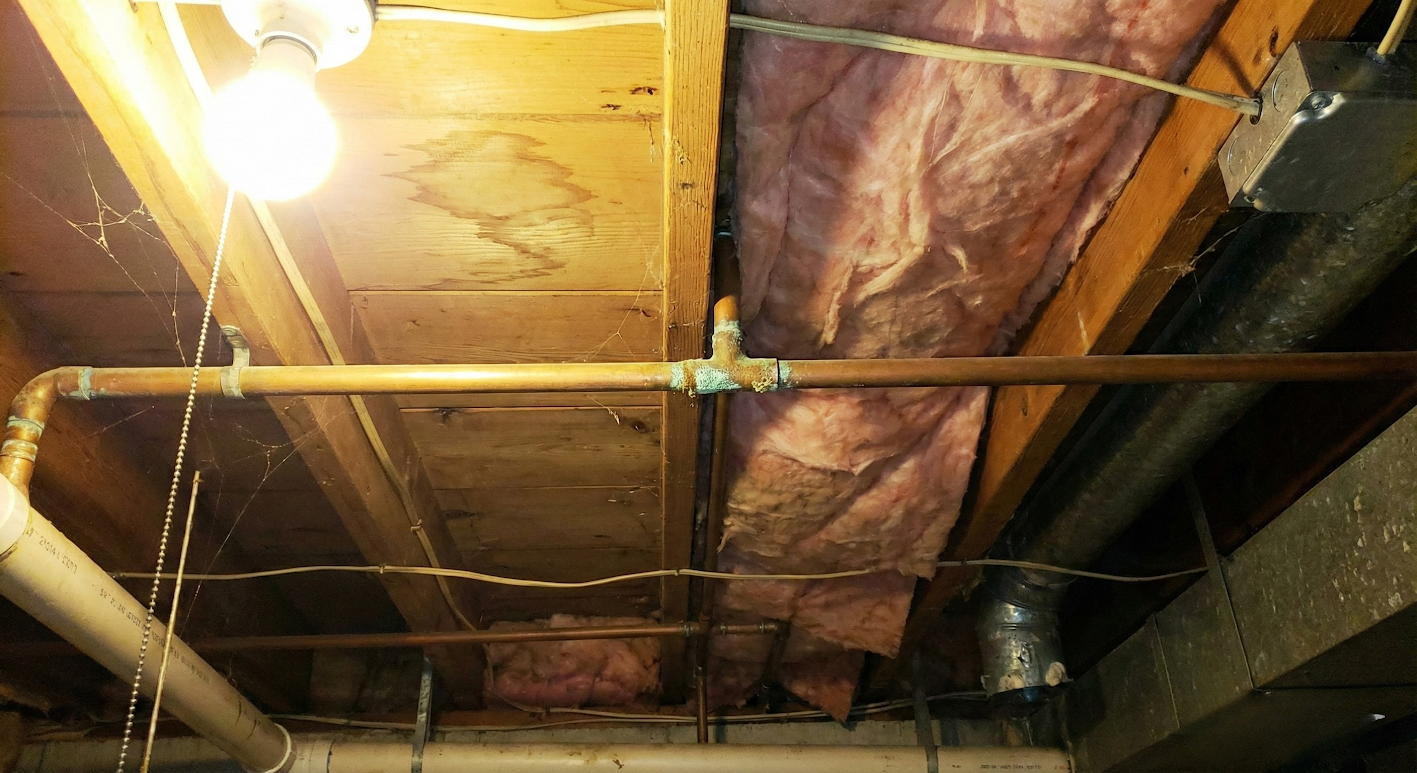
Look Up at the Ceiling, Joists, Pipes, and Wiring
The overhead area in a basement often reveals water and system problems before they become obvious elsewhere in the house. Exposed framing, subflooring, drain lines, supply lines, and sections of electrical work can give a very honest view of what has happened over time.
- Water stains on joists, beams, or exposed wood framing
- Darkened subflooring or repeated discoloration around plumbing runs
- Active dripping at pipe joints, shutoff valves, or fittings
- Rust, corrosion, or mineral buildup on metal pipes
- Sagging insulation or damaged materials from past moisture
- Exposed splices, loose electrical boxes, or unsafe visible wiring
- Mold-like spotting on framing near damp utility areas
If wood appears freshly stained, pipes show active moisture, or the air feels damp in this area, there may be a current issue instead of an older one. Ceiling clues matter because ongoing moisture can eventually affect insulation, flooring, framing strength, and indoor air quality.
It also helps to think about location. A stain below a bathroom, kitchen, laundry area, or exterior wall may suggest a different source than one found near a utility connection or mechanical corner.
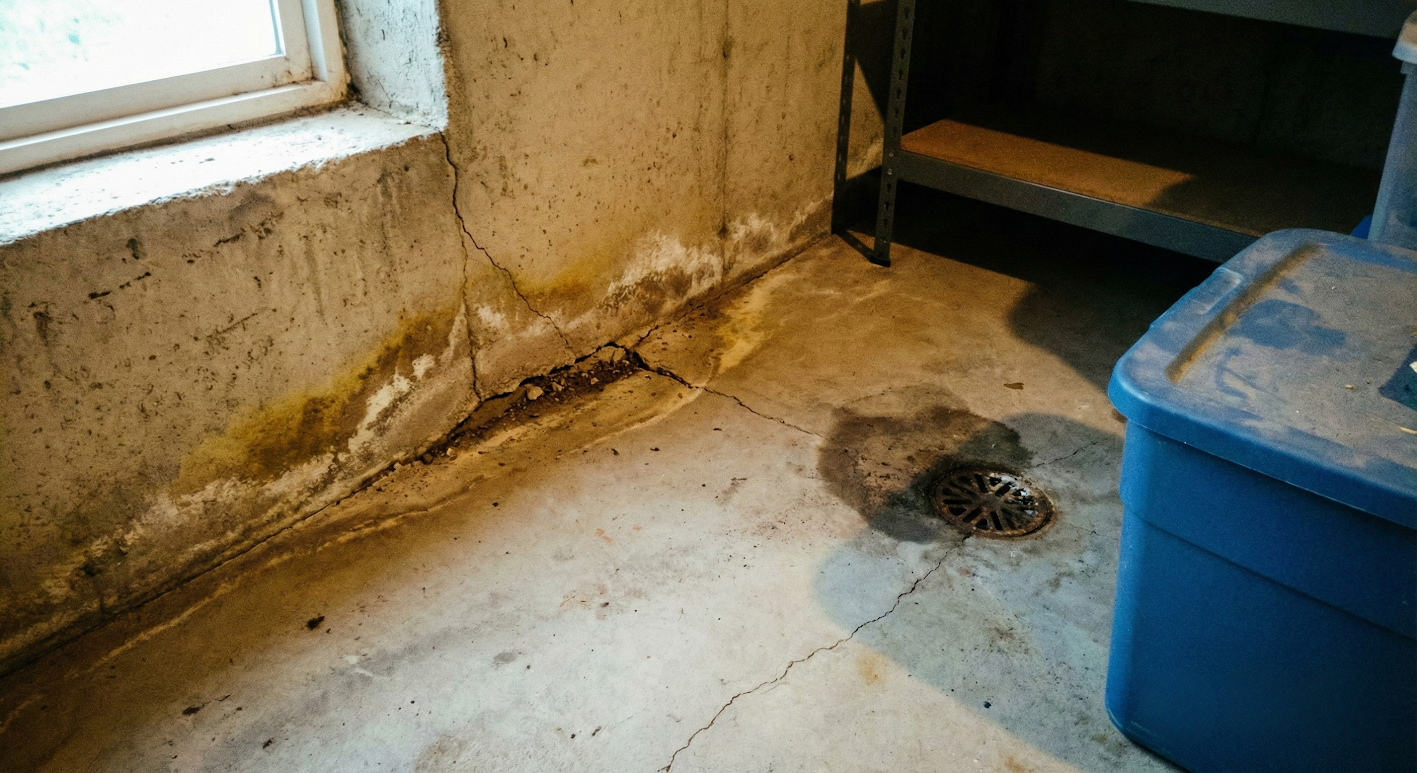
Look Down at the Basement Floor and Foundation Walls
Basement floors and foundation walls often show whether the home has moisture intrusion, settlement, drainage problems, or long-term wear. Small hairline cracks in concrete can be common, especially in older houses, but wider cracks, shifting, or repeated dampness deserve closer attention.
- Hairline cracks compared with wider, spreading, or offset cracks
- Floor sections that slope, dip, or feel uneven underfoot
- Dampness where the floor meets the wall
- White chalky residue known as efflorescence on masonry surfaces
- Peeling paint, bubbling wall finishes, or repeated patching
- Rust on stored items that may suggest previous flooding
- Signs that water tends to collect in corners or along edges
These floor and wall conditions can show how water moves through or around the property. If the same area repeatedly shows dampness, residue, or discoloration, the cause may be related to exterior grading, poor drainage, clogged gutters, foundation pressure, or long-term humidity.
Fresh paint, isolated wall patches, or recently replaced trim may be harmless, but they can also suggest previous cosmetic damage or an attempt to hide a recurring issue. When those updates appear alongside odor, residue, or uneven surfaces, they deserve a closer look.
Check the Mechanical and Utility Areas
Basements often contain the water heater, furnace, HVAC components, vents, sump pump, shutoff valves, and electrical equipment. These systems affect both safety and future repair cost, and they can also show how well the property has been maintained.
- Rust at the base of the water heater or around fittings
- Corrosion, leaking connections, or moisture near valves
- Dirty filters or heavy buildup around HVAC equipment
- Loose, missing, or damaged venting components
- Standing water near drains, utility corners, or mechanical equipment
- Improper extension-cord workarounds or unsafe utility setups
- Older equipment labels that suggest age and near-term replacement risk
A basement can still look usable even when the systems inside it are nearing the end of their service life. Visible neglect around the water heater, HVAC area, or sump equipment can be a sign of future cost, even when there is no immediate emergency.
Mechanical issues matter because they influence repair planning, negotiation, and the timeline for selling. Some buyers are comfortable with cosmetic wear but become much more cautious when the utility systems appear old, poorly maintained, or unsafe.
Basement Moisture Warning Signs Many People Miss
Moisture does not always show up as standing water. In many homes, it appears first as odor, humidity, staining, rust, bubbling finishes, mildew-like spotting, or the need to run a dehumidifier full time.
These conditions often get normalized because they develop slowly. A musty smell may seem typical, or rusted shelving may get ignored, but repeated moisture can affect stored items, air quality, and long-term repair cost if the root cause is never addressed.
Safety Concerns to Take Seriously
Some basement findings should not be brushed off. If you smell gas, see exposed live wiring, find standing water near electrical components, or notice signs of major structural movement, stop and treat the issue as a safety concern.
Loose utility connections, poor venting, unprotected wiring, and major water intrusion can create risks that go beyond ordinary cosmetic wear. When in doubt, it is better to flag the problem than assume it is minor.
Why Basement Findings Matter When Selling a House
Basement conditions can affect buyer confidence, negotiation strength, repair expectations, and selling timeline. Moisture stains, foundation concerns, mold-like growth, aging systems, and visible deferred maintenance can all make retail buyers more cautious.
Understanding what you see in the basement gives you a stronger position when deciding what to do next. Some homeowners choose to repair issues before listing. Others want a realistic understanding of the property as-is so they can decide whether to list traditionally or explore a direct sale.
Frequently Asked Questions About Basement Inspection
Is every crack in a basement floor or wall a major structural issue?
No. Some hairline cracks can be normal in concrete over time. What matters is the width, pattern, movement, moisture, and whether the crack appears to be worsening or tied to shifting surfaces.
What does a musty basement smell usually mean?
A musty smell often suggests persistent moisture, poor airflow, previous water intrusion, or possible mold growth. Even when water is not visible, odor can be an important clue.
Should I worry about rust on pipes or around the water heater?
Rust does not always mean immediate failure, but it can point to age, ongoing moisture, corrosion, or maintenance problems that deserve attention.
Can basement issues affect a home sale?
Yes. Basement moisture, structural concerns, utility deterioration, and visible repair needs can all influence buyer interest, pricing discussions, financing, and timeline.
Talk With a Local Home Buyer
If your basement inspection raised concerns about repair cost, selling timeline, or whether it makes sense to fix anything first, we can help you understand your options and what selling as-is could look like.
